An ON-AIR sign with IoT
Building an sign with iot to show when you are in a meeting"
Repost from the blog from on the edrans medium page
In this last year, we have all been working mostly from home, using video meetings to connect to customers and coworkers. How many times did you have an unplanned appearance of someone at your home? There are many viral videos on the internet like this one. A simple indicator that you are “ON-AIR” outside the room, could help to prevent this.
 <a href=”https://www.freepik.com/vectors/sign”>Sign vector created by freepik — www.freepik.com
Step 1: How to detect if the camera is ON?
Of course we want to automate this, a manual switch can be forgotten. I use many different Video conferencing tools on my Mac: Zoom, Google Meeting, Slack, etc… so for this I was looking for a generic way to detect if the camera is ON.
My first try was using the software: Oversight; it detects which software the camera uses and asks you to deny/allow access. Parsing the log file worked, but not 100%. For example it didn’t detect the closing of the tab with Google Meet. The solution was going deeper in the OS. In Linux the camera device is /dev/video0, so using lsof you can detect if a process has the file handle for the camera open. Unfortunately on the Mac the camera isn’t a simple dev device. But some searching pointed me to the following stack-overflow page.
The Mac log stream contains all system log events: one of these many events is the KCameraStreamStart/Stop event; this is fired when the camera is opened, and it works for the built-in camera, usb, and virtual cameras.
log stream | grep “Post event kCameraStream”2020–12–01 14:58:53.137796–0500 0xXXXXXX Default 0x0 XXX 0 VDCAssistant:[com.apple.VDCAssistant:device] [guid:0xXXXXXXXXXXXXXXXX] Post event kCameraStreamStart2020–12–01 14:58:56.431147–0500 0xXXXXXX Default 0x0 XXX 0 VDCAssistant:[com.apple.VDCAssistant:device] [guid:0xXXXXXXXXXXXXXXXX] Post event kCameraStreamStop2020–12–01 14:58:56.668970–0500 0xXXXXXX Default 0x0 XXX 0 VDCAssistant:[com.apple.VDCAssistant:device] [guid:0xXXXXXXXXXXXXXXXX] Post event kCameraStreamStartYou can test it on your own Mac, running this command in your terminal. Awk is an advanced text processing utility that is installed by default on the Mac, it enables us to execute a command when a specific text is matched.
log stream | awk ' /Post event kCameraStreamStart/ { system("say active") } /Post event kCameraStreamStop/ { system("say inactive") }'Open your video meeting software, turn ON/OFF the camera and the system will say “active” or “inactive” over your speaker.
Great, problem 1 solved.
Step 2: Communicate between the laptop and our sign
The standard for communication in the IoT is MQTT; this is a lightweight protocol that allows a source to publish a message to a topic. Targets can subscribe to the topic and are notified when a message arrives.
Source -> Publish Message { test: 1 } -> Topic: sensor/topic1Topic: sensor/topic1 -> Subscribe -> Target Device { test: 1 }I’m using the mosquito broker from Home Assistant that I have running at home for device integrations; it runs on a Raspberry Pi. If you don’t have an MQTT server running it’s easy to install on your Mac with the following commands:
brew install mosquittomosquitto_passwd -c -b /usr/local/etc/mosquitto/pwfile mqtt brokercat <<EOT >> /usr/local/etc/mosquitto/mosquitto.conflistener 1883password_file /usr/local/etc/mosquitto/pwfileEOTbrew services start mosquittoThis installs an MQTT server listening on port 1883, with user: MQTT and password broker.
Step 3: Post a message from the Mac to the MQTT
I’m using hivemq mqtt-cli as a cli to post messages; it can be installed and tested like this:
brew tap hivemq/mqtt-clibrew install mqtt-cliLet’s test if all works: I publish a message { onair: 1} to topic sensor/camera/laptop-jacob on my mqtt server at 192.168.1.100 with user mqtt and password broker.
Listener
mqtt sub --topic sensor/camera/laptop-jacob -h 192.168.1.100 -u mqtt -pw broker
Sender
mqtt pub --topic sensor/camera/laptop-jacob -h 192.168.1.100 -u mqtt -pw broker --message "{ 'onair': 1 }"
As soon as the sender is executed, the listener will show: { 'onair': 1 } If it doesn’t work, check the configuration, firewall and if you have exactly the same topic name.
Testing the camera
Let the subscribe script run. This is the script you can save in /usr/local/bin/watch-camera.sh, it combines the awk line with the mqtt publish. If the camera is ON it pushes { onair: 1 }, when it’s OFF: { onair: 0 }.
Note the double escape to format the message.
#!/usr/bin/env bashlog stream | awk ' /Post event kCameraStreamStart/ { system("mqtt pub -V 3 -d -i laptop-jacob -p 1883 --topic sensor/camera/laptop-jacob -h 192.168.1.100 -u mqtt -p broker --message \"{ \\\"onair\\\": 1 }\"") } /Post event kCameraStreamStop/ { system("mqtt pub -V 3 -d -i laptop-jacob -p 8883 --topic sensor/camera/laptop-jacob -h 192.168.1.100 -u mqtt -p broker --message \"{ \\\"onair\\\": 0 }\"") }'Run: chmod +x /usr/local/bin/watch-camera.sh to make it executable.
Run: watch-camera.sh to start sending messages when your camera is on/off
Open your “favorite” video conferencing tool and turn ON/OFF the camera. In the console window, you subscribed on mqtt you see the messages coming in.
Step 4: A connected ON-AIR sign
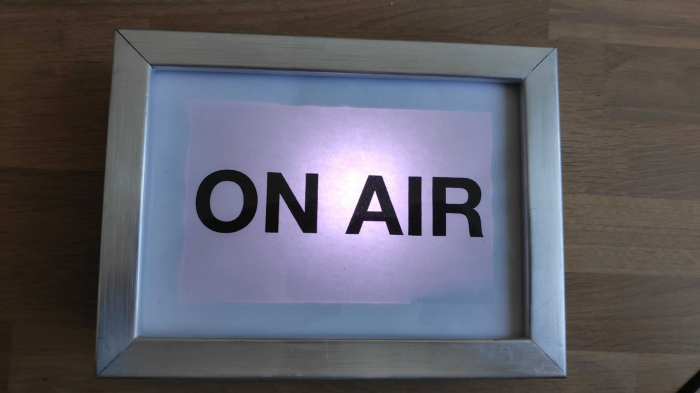
Here comes the fun part, let’s build the sign. I’m going for the photo frame style, but you can design anything you want.
My sign:
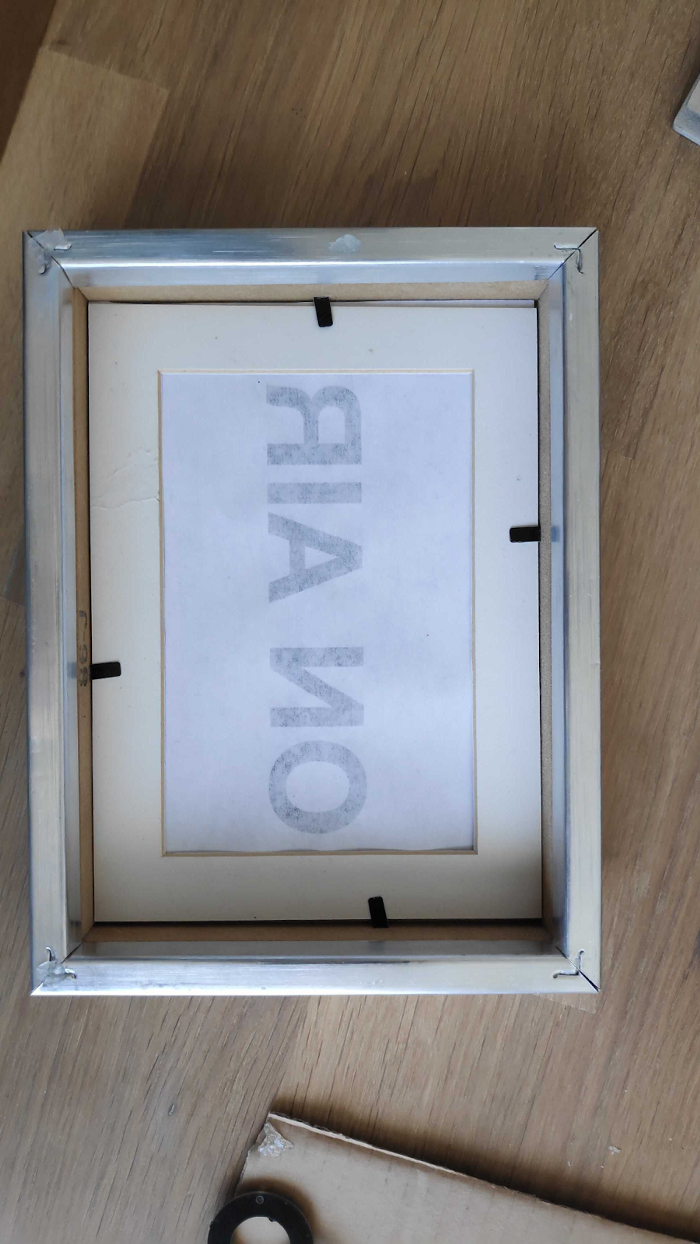
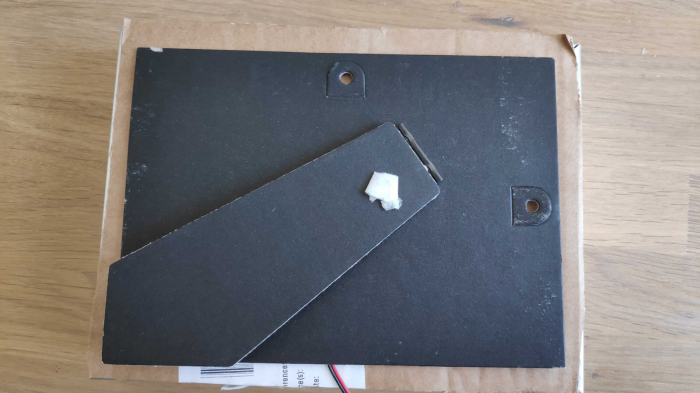
- Old Ikea photo frame with a deep frame
- A printed paper with “ON AIR”
- Some carton, scotch tape, and double-sided tape


More pictures can be found: https://github.com/jverhoeks/on-air/blob/main/on-air-display/DEMO.md
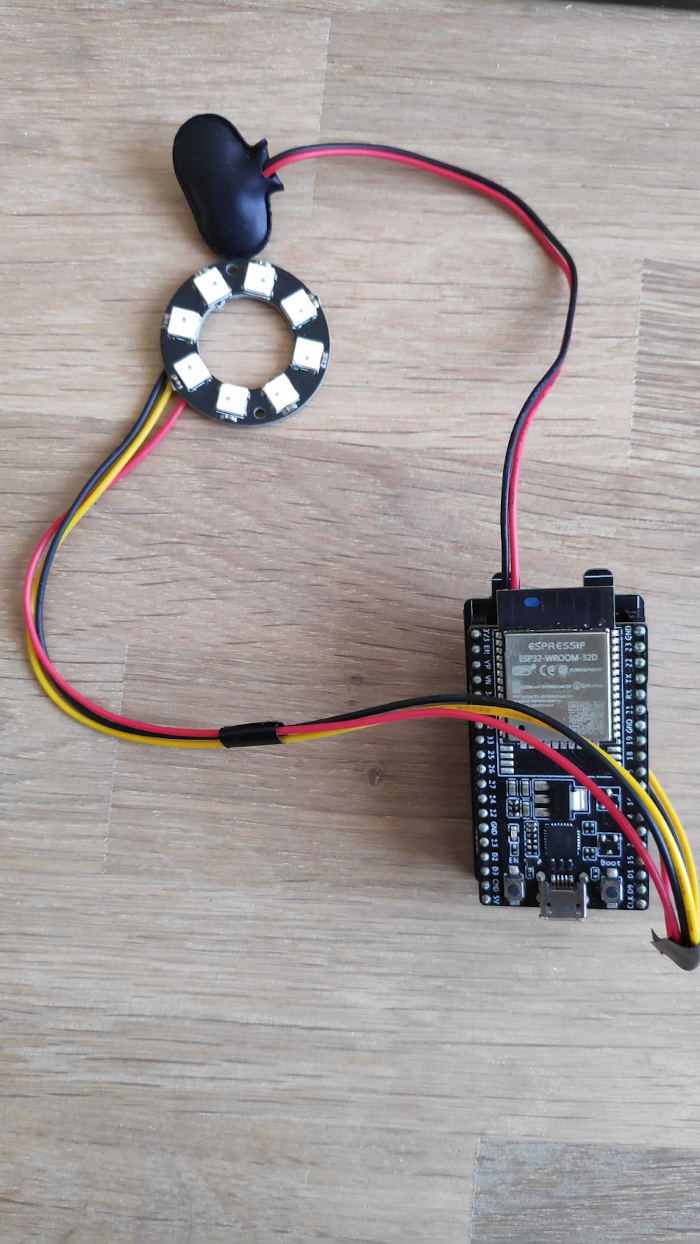
For the electronics I use an ESP32 with an 8 led circle board. I re-used a board I got from Re:Invent 2018 as a drinkwater dispenser by Anton Shmagin & Gavin Admins. It has a daugherboard for the esp32 to connect the leds and a 9V battery connector.

Any kind of addressable Leds can be easily used. WS2812b based like Adafruit Neopixel.
Circuito.io
If you need some help with the electronics there is a great website circuito.io. It has a great collection of devices, leds, etc. which you can drag and drop into a design. Besides the great visual like below it gives you a list of parts and even example code to start your project. This is mine:
https://www.circuito.io/app?components=513,216577,360217
This is a basic design for the On-Air Sign. The components are about $20.
https://www.circuito.io/app?components=513,216577,360217
Arduino Code
The code for the sign can be found here:
https://github.com/jverhoeks/on-air/tree/main/on-air-display
- Install the Arduino Software
- Install the ESP32 board software
- Install the required libraries
- Rename the iot.h.templ to iot.h and fill in the required fields
It contains the topic, host, username, password. As well as the WIFI credentials. If your LED is different change the LED_PIN and LED_COUNT to match your configuration:
#define IOT_SUBSCRIBE_TOPIC "sensor/camera/laptop"#define THINGNAME "on-air-display"#define LED_PIN   5#define LED_COUNT 8
const char WIFI_SSID[] = "xxx";const char WIFI_PASSWORD[] = "xxxxx";const char IOT_ENDPOINT[] = "192.168.1.100";const char IOT_USER[] = "mqtt";const char IOT_PASSWORD[] = "broker";const int IOT_PORT = 1883;
Change the PIN id for the LED controller.
Run compile and upload to the esp32
Extra Libraries
- Adafruit_NeoPixel: https://github.com/adafruit/Adafruit_NeoPixel
- MQTT (by Joel Gaelwiler): https://github.com/256dpi/arduino-mqtt
- ArduinoJson (by Benoit Blanchon): https://arduinojson.org/
Step 5: Testing it
Before you construct your sign, test the code first with the Arduino SerialMonitor enabled. Booting esp32, by connecting the USB-cable:
Connecting to WiFi ..IP: <device ip>RRSI: -xxConnecting to MQTT: <mqtt endpoint>MQTT Connected!Start the script on the Mac and Turn ON/OFF your camera
Check if the lights are turning ON/OFF
You should see LED ON / LED OFF and the LEDs are turning ON/OFF in the serial console.

That’s it! You can now place it somewhere visible outside your office and stop the interruptions.